Google BigQuery is a great big data storage – it is simple, fast, and highly scalable. BigQuery’s SQL allows you to satisfy most of the needs that usually buisness may have – join tables, data transformation, calculations and so on. But sometimes you may need more complicated cases of data transformation when SQL does not meet all you needs because of limited syntax, lack of functions, loops, etc. Simple Python libraries like pandas also may not help if you working with really big amount of data. That’s the case when you may want to learn PySpark and start working with BigQuery data on Spark cluster. Google Cloud Platform allows you to easily create Spark cluster and try PySpark in Jupyter Notebooks on your data. That’s are the main steps how to try it:
- Create Jupyter Notebook on GCP
- Create a cluster in Dataproc
- Perform PySpark on BigQuery data using Dataproc cluster
Create Jupyter Notebook on GCP
At first – we will create a Jupyter Notebook in Google Cloud environment, later we will be running our PySpark code there. We will use Vertex AI Workbench service for that, and create a managed notebook:

Now – we gonna give our notebook a name and select a Region (it is important step because Dataproc cluster will should have the same region). You can select any region, for example – one that is closer to your location.
In next step we should click “Advanced settings” and select a Machine type for our notebook – the cheapest one “n1-standard-1” is enough. We gonna pay for our notebook hourly, so option “Enable idle shutdown” will be very useful also – thanks to that our notebook will be shut down after the specified time interval of inactivity.
That is all you need – so click “Create”.


Create a cluster in Dataproc
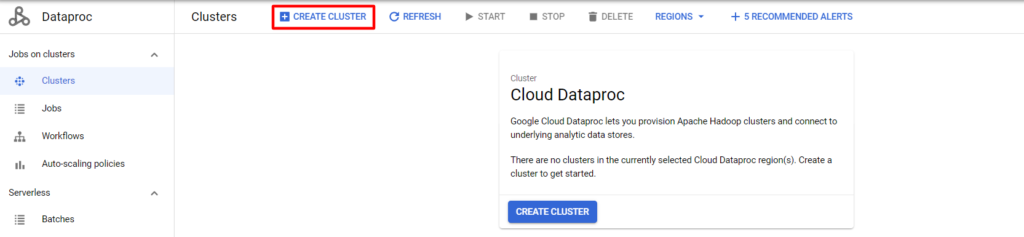
Let’s create a Spark cluster where our PySpark code will be calculated. We will use a GCP service called Dataproc for that. Go to Dataproc – Clusters, click “Create Cluster” and select “Create the cluster on Compute Engine”.
Next – give cluster a name and set a Region (it is important that cluster should have the same region as your notebook from previous step). Also enable component gateway and set Jupyter Notebook as optional component.


On the left side you can go to “Configure nodes” section and select suitable configuration of your cluster’s nodes depending on your needs (lowest machine will be ok for test):

Next important step is to set some initialisation actions for out cluster that will allow us to use Spark BigQuery connector. Go to “Customise cluster” section, click “Add initialisation action” and paste this value there replacing {region} with region of your cluster and Jupyter Notebook:
goog-dataproc-initialization-actions-{region}/connectors/connectors.shFor example this will be goog-dataproc-initialization-actions-europe-west1/connectors/connectors.sh in my case.
Also add metadata with spark-bigquery-connector-version as a key, and 0.21.0 (check here for newest version) as a value as on screen below. Then – click “Create” in order to create your cluster.

You can also optionnaly generate an equivalent command line in order to create such cluster from GCP command line faster for future use:
gcloud dataproc clusters create my-cluster --enable-component-gateway --region europe-west1 --zone europe-west1-b --master-machine-type n2-standard-2 --master-boot-disk-size 500 --num-workers 2 --worker-machine-type n2-standard-2 --worker-boot-disk-size 500 --image-version 2.0-debian10 --optional-components JUPYTER --initialization-actions 'gs://goog-dataproc-initialization-actions-europe-west1/connectors/connectors.sh' --metadata spark-bigquery-connector-version=0.21.0 --project {your GCP project ID}Perform PySpark on BigQuery data using Dataproc cluster
Now after we have created Jupyter Notebook and Dataproc cluster – let’s back to Vertex AI Workbench and click “Open Jupyterlab”. You should see something like this on your screen:

Next – select notebook “PySpark on {name of your cluster}” like on screenshot above.
Pay attention that you are running your PySpark on your cluster now, that is a good sign – it means your are using the power of your cluster 🙂
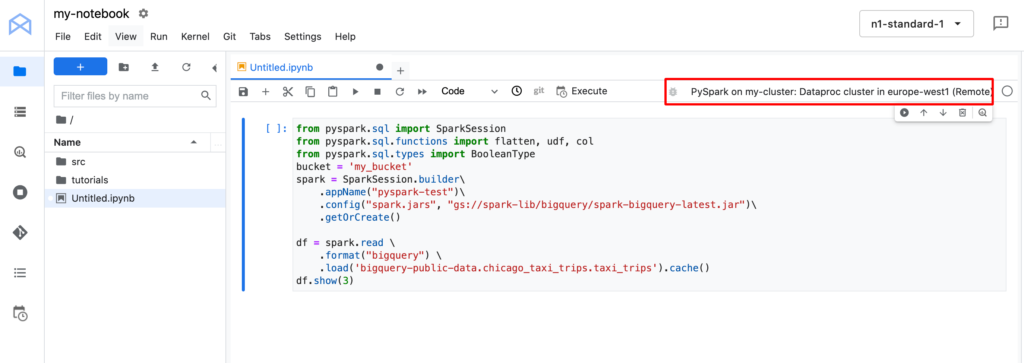
Now you can run PySpark, there is a simple code example you can run on Google BigQuery public data:
from pyspark.sql import SparkSession
from pyspark.sql.functions import flatten, udf, col
from pyspark.sql.types import BooleanType
bucket = 'my_bucket'
spark = SparkSession.builder\
    .appName("pyspark-test")\
    .config("spark.jars", "gs://spark-lib/bigquery/spark-bigquery-latest.jar")\
    .getOrCreate()

df = spark.read \
    .format("bigquery") \
    .load('bigquery-public-data.chicago_taxi_trips.taxi_trips').cache()
df.show(3)
Remember to create a bucket in Cloud Storage and replace my_bucket with the name of your bucket in code above.
After running that code – cluster will start to calculate, after some time you should see something like on screenshot below.
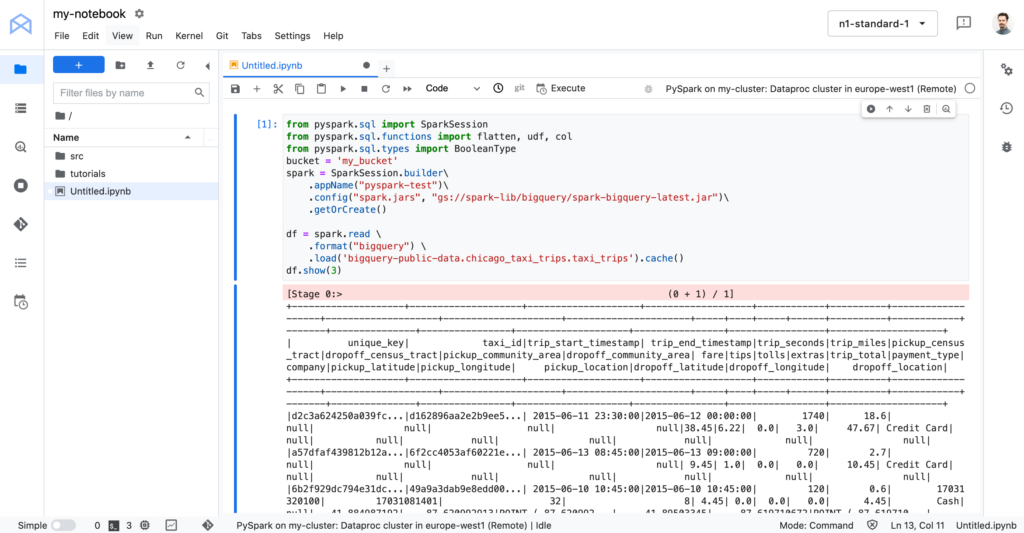
If you’ve done everything right – you can start using PySpark and test it on your own data in BigQuery. But remember to delete your cluster after use, good luck!

what if i am not getting PySparak on my cluster option in the jupyterlab?